 Back to Excel Newsletter Archives
  Back to Excel Newsletter Archives
EXCEL TIPS AND TRICKS | EXCEL VBA TIPS AND TRICKS
Current Special! Complete Excel Excel Training Course for Excel 97 - Excel 2003, only $145.00. $59.95 Instant Buy/Download
CUSTOMISING TOOLBARS
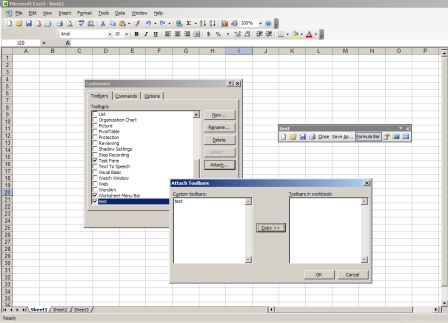
The toolbars in Excel can be easily manipulated to allow a user to customize their own toolbar. This is great for situations where there is a shared workbook used by multiple users. Each user can easily customize their own toolbar with their preferred buttons and built-in menus and even create their own menus and place them on the toolbar. Users can then show only their own personal toolbar when using the shared workbook. If you wish, you can customize a toolbar and attach it to a workbook so that the toolbar shows every time the workbook is opened.
CREATING A CUSTOMIZED TOOLBAR
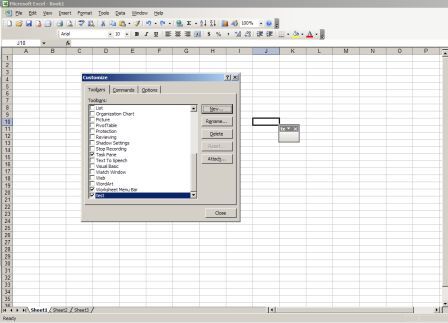
To create a customized toolbar, go to Tools>Customize and the Customize dialog will pop up. Click on the NEW button and under TOOLBAR NAME type in a name for your new toolbar, then click OK
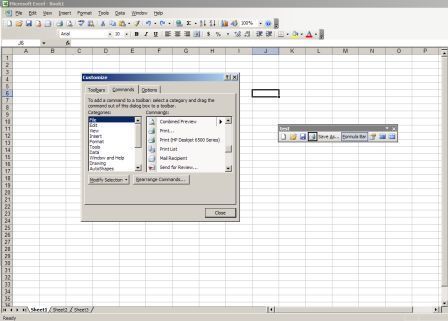
You will see a blank toolbar with the toolbar name at the left displayed on your screen, you will also see the name of your toolbar in the toolbar list within the Customize dialog.


See Also:Record Excel Macros | Assign Macros . See Also VBA : Create Custom Excel Menu Items | Hide/Restore Excel Toolbars
Current Special! Complete Excel Excel Training Course for Excel 97 - Excel 2003, only $145.00. $59.95 Instant Buy/Download,30 Day Money Back Guarantee & Free Excel Help for LIFE!
Got any Excel Questions? Free Excel Help .
See Also: Excel Ranges
Excel: Excluding Headings/Headers from the Current Region/Table
It's often that one needs to work on a range of data, or table, but NOT include any headings/headers. This can be done very easily with the ListHeaderRows Property of an Range Object. Before we can use the ListHeaderRows Property we must first determine the table range. If your table is set up correctly (no blank rows or columns) this can be done very easily via the CurrentRegion Property. That is,
Sub DetermineGoodTable()Dim rTable As Range rTable = Sheet1.Range("A1").CurrentRegionEnd Sub
However, if your table DOES include blank rows or columns, we must find the outer top left and bottom right cell. This can be done like below where we know A1 to be our top left cell of the table.
Sub DetermineBadTable()Dim rTable As Range With Sheet1 Set rTable = .Range(.Range("A1"), _ .Cells(65536, .Range("IV1").End(xlToLeft).Column).End(xlUp)) End With End Sub
Ok, now we have determined and set a Range variable (rTable) to out table range it's time to redefine the Range variable so no headers/headings are included. Here is how via the use of the ListHeaderRows Property.
Sub GoodTableWithHeaders()Dim rTable As RangeDim lHeadersRows As Long Set rTable = Sheet1.Range("A1").CurrentRegion lHeadersRows = rTable.ListHeaderRows 'Resize the range minus lHeadersRows rows If lHeadersRows > 0 Then Set rTable = rTable.Resize(rTable.Rows.Count - lHeadersRows) 'Move new range down to Start at the fisrt data row. Set rTable = rTable.Offset(lHeadersRows) End If End Sub
What Constitutes a Heading/Header Row
If your table is numeric data and you headings are text (or vice verca), Excel will assume row 1 of the table as a header row. However, if your data AND headings are both numeric, or both text, Excel will consider your table as having NO headers. The way to overcome this is to make your headings different to that of the data. This can be done via bolding, font color/size etc.
Or, should you simply know for a fact that row 1 of the table IS a header row you can use the code below;
Sub GoodTableDataHeaders()Dim rTable As Range Set rTable = Sheet1.Range("A1").CurrentRegion Set rTable = rTable.Resize(rTable.Rows.Count - 1) 'Move new range down to Start at the fisrt data row. Set rTable = rTable.Offset(lHeadersRows) End Sub
Excel: Add Description & Category for UDF
Excel Custom Functions are great way to eliminate horribly long nested functions and/or to use ones own custom calculations. However, when a Custom Function (UDF/User Defined Function) is written it is, by default, added to the User Defined category of the Insert Function dialog. With the use of the MacroOptions Method we can add any Custom Function to any category, or add it to a custom category that we create. We can also use MacroOptions Method to write a brief description about our Custom Function.
MacroOptions Method
Syntax: ALL arguments are optional.
MacroOptions(Macro, Description, HasMenu, MenuText, HasShortcutKey, ShortcutKey, Category, StatusBar, HelpContextID, HelpFile)
The following table lists which numbers correspond to the built-in categories that can be used in the Category parameter.
1=Financial
2=Date & Time
3=Math & Trig
4=Statistical
5=Lookup & Reference
6=Database
7=Text
8=Logical
9=Information
10=Commands
11=Customizing
12=Macro Control
13=DDE/External
14=User Defined
15=First custom category
The MacroOptions Method is a method of the Application Object and corresponds to options in the Macro Options dialog box. We can also use this method to display a User Defined Function (UDF) in a pre-existing built-in category or new category within the Insert Function dialog box. The main thing you must be aware of is that the custom category, if we specify one, is not retained be Excel sessions. This means we should use the Workbook Open Event to call our Procedure for adding a UDF to a category and adding a description.
The code below shows the use of the MacroOptions Method. In this case it will add a Function called ColorFunction to its own category called "Color Functions" and add a description. If this category does not yet exist, it will create it for you.
Sub AddCategoryDescription()Application.MacroOptions Macro:="ColorFunction", _ Description:="Sums or counts cells based on a specified fill color", _ Category:="Color Functions"End Sub
Add More Than One Function, Description & Category
It's often the case that more than one custom function needs to be added. In cases like these we can use the Choose function and a simple For Loop .
Sub AddManyCategoryDescription()Dim strFunction As StringDim strDescript As StringDim vCatDim lLoop As Long With Application For lLoop = 1 To 3 'Pass function name strFunction = Choose(lLoop, "ColorFunction", _ "StatsFunction", "DatabaseFunction") 'Pass function description strDescript = Choose(lLoop, _ "Sums or counts cells based on a specified fill color", _ "A statistical function", "A database function") 'Pass function category vCat = Choose(lLoop, "Color Functions", 4, 6) .MacroOptions Macro:=strFunction, Description:=strDescript, Category:=vCat Next lLoop End WithEnd Sub
Lot's More: Excel VBA . See Also: Manually Adding UDF to Category and Add Description
Software Categories ![]() Search Software
Search Software
Excel Add-ins || Excel Training || Excel Templates || Employee Scheduling Software || Excel Password Recovery and Access & Word etc|| Excel Recovery and Access & Word etc || Financial Software || Financial Calculators || Conversion Software || Construction Estimating Software || Drilling Software || Real Estate Investment Software || Time Management Software || Database Software || Neural Network Software || Trading Software || Charting Software || Windows & Internet Software || Barcodes Fonts, ActiveX, Labels and DLL's || Code Printing Software || Outlook Add-ins
Microsoft ® and Microsoft Excel ® are registered trademarks of Microsoft Corporation. OzGrid is in no way associated with Microsoft.